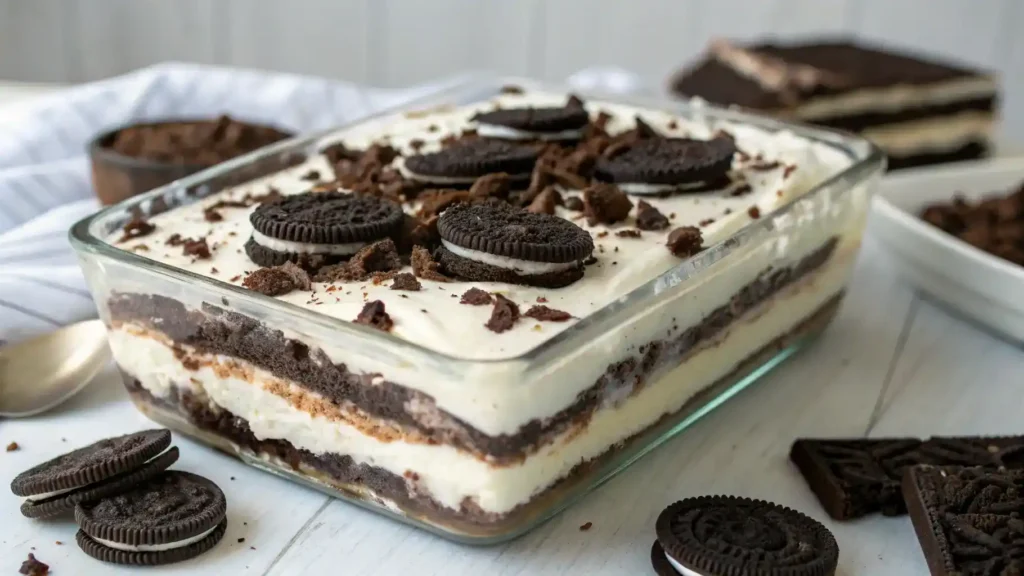

Easy Ice Cream Cake is the perfect treat to bring joy to any gathering! Imagine layers of creamy, dreamy ice cream nestled between soft, crumbly cake, all topped with a luscious swirl of whipped cream and colorful sprinkles. This delightful dessert is not only simple to make but also customizable—choose your favorite flavors and mix-ins to create a masterpiece that will have everyone smiling. Whether it’s a birthday, a summer barbecue, or just a sweet craving, this cake is sure to impress and satisfy. Dive into a slice of happiness today!
Table of Contents
Why You’ll Love This Recipe
- It’s a breeze to make, perfect for busy days.
- Customizable flavors to suit every taste bud.
- Impress your friends and family with minimal effort.
- Perfect for any celebration or just a sweet treat.
- Kids love it, and so will the kids at heart!
Recipe Snapshot
| Feature | Details |
|---|---|
| Category: | Dessert |
| Cuisine: | American |
| Prep Time: | 20 minutes |
| Cook Time: | 0 minutes |
| Total Time: | 4 hours (including freezing) |
| Dietary: | Vegetarian |
| Serves: | 8-10 |
| Best Served: | Chilled |
Ingredients
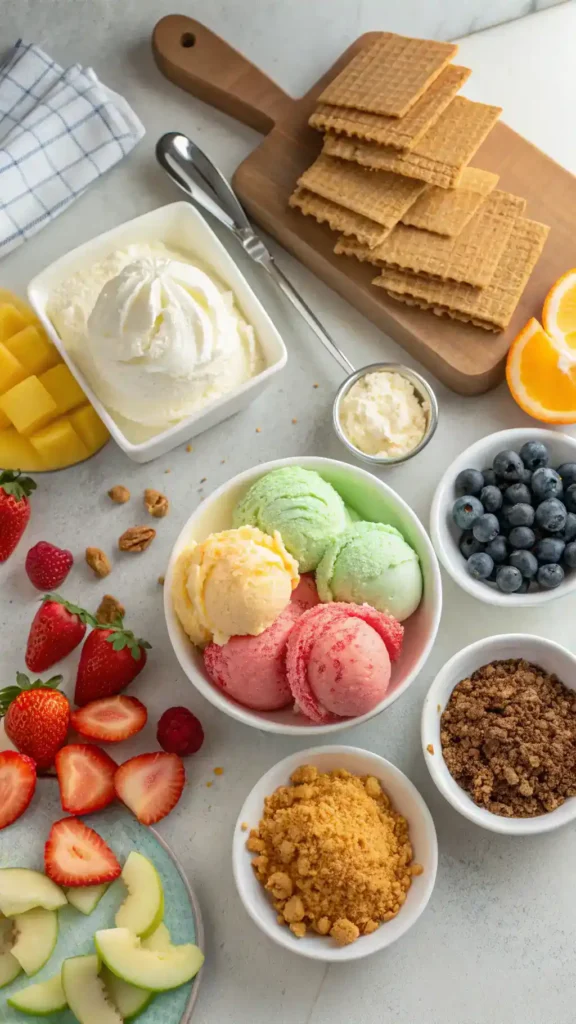
- Ice Cream – Choose your favorite flavors for a delightful base.
- Graham Cracker Crumbs – Perfect for a crunchy crust that holds everything together.
- Whipped Topping – Adds a light and fluffy texture to your cake.
- Chocolate Syrup – Drizzle for extra sweetness and a beautiful presentation.
- Fresh Fruit – Use seasonal fruits for a refreshing touch and added flavor.
- Sprinkles – Fun and colorful, they make your cake festive and appealing.
Ingredients with measurements will be right under the article in the recipe card.
How to Make the Recipe
Get ready to create a delightful Easy Ice Cream Cake that will impress everyone!
Step 1: Gather Your Ingredients
Collect your favorite ice cream flavors, cake layers, whipped cream, and sprinkles.
Step 2: Prepare the Cake Layers
Bake your cake layers according to the recipe or use store-bought cakes for convenience.
Step 3: Let the Cake Cool
Allow the cake layers to cool completely before assembling.
Step 4: Soften the Ice Cream
Let the ice cream sit out for about 10 minutes to soften for easy spreading.
Step 5: Assemble the Cake
Place one cake layer on a serving plate and spread a layer of ice cream on top.
Step 6: Add More Layers
Repeat with additional cake and ice cream layers until you reach your desired height.
Step 7: Frost with Whipped Cream
Cover the entire cake with whipped cream for a smooth finish.
Step 8: Decorate
Add sprinkles, chocolate chips, or fruit on top for a fun touch.
Step 9: Freeze the Cake
Place the cake in the freezer for at least 4 hours to set properly.
Step 10: Serve and Enjoy!
Slice, serve, and watch everyone enjoy your delicious creation!
Pro Tips for Making the Recipe
- Use softened ice cream for easier layering and spreading.
- Mix in your favorite toppings like crushed cookies or fruit for added flavor.
- Let the cake sit at room temperature for a few minutes before slicing for cleaner cuts.
- Experiment with different cake bases, like chocolate or vanilla, to match your ice cream flavor.
- Wrap the cake tightly in plastic wrap to keep it fresh in the freezer.
How to Serve
Here are some fun and creative ways to enjoy your Easy Ice Cream Cake:
- Top with fresh berries for a burst of flavor.
- Drizzle chocolate or caramel sauce for extra sweetness.
- Serve with a scoop of your favorite ice cream on the side.
- Add a sprinkle of crushed cookies or nuts for crunch.
- Pair with a refreshing fruit salad for a light contrast.
- Garnish with whipped cream and a cherry on top.
- Slice and serve with a warm chocolate sauce for a delightful melt.
- Enjoy with a cup of hot cocoa or a chilled fruit smoothie.
Make Ahead and Storage
Proper storage ensures your Easy Ice Cream Cake stays delicious for later enjoyment.
Storing Leftovers
– Allow the cake to cool completely before storing.
– Cover the cake tightly with plastic wrap or aluminum foil.
– Place it in an airtight container for extra protection.
– Store in the refrigerator for up to 3 days.
Freezing
– Slice the cake into individual portions for easy access.
– Wrap each slice in plastic wrap, then in aluminum foil.
– Place wrapped slices in a freezer-safe bag or container.
– Freeze for up to 2 months for best quality.
Reheating
– Thaw the cake in the refrigerator overnight before serving.
– For a warm treat, microwave individual slices for 10-15 seconds.
– Avoid overheating to maintain the cake’s texture.
FAQs
Can I use any type of ice cream for this cake?
Absolutely! Feel free to choose your favorite ice cream flavors. Whether it’s classic vanilla, rich chocolate, or fruity sorbet, the choice is yours. Just ensure the ice cream is slightly softened for easy layering.
How long should I freeze the cake before serving?
It’s best to freeze the cake for at least 4-6 hours, or overnight if possible. This allows the layers to set properly, making it easier to slice and serve. Just remember to let it sit at room temperature for a few minutes before cutting!
Can I add toppings or mix-ins to the cake?
Definitely! Get creative with toppings like crushed cookies, fresh fruits, or chocolate syrup. You can also mix in candies or nuts between the layers for added texture and flavor. The possibilities are endless!
What can I use instead of whipped cream for decoration?
If you’re looking for a substitute, consider using coconut whipped cream or a dairy-free alternative. Both options provide a delicious and fluffy topping that complements the ice cream cake beautifully.
Final Thoughts
There you have it—your new go-to recipe for an Easy Ice Cream Cake! It’s a delightful treat that’s perfect for any celebration or just a cozy night in. Remember, the joy of making this cake is as sweet as the first bite! So gather your loved ones, whip up this simple dessert, and create some delicious memories together. Enjoy every creamy, dreamy slice!

Easy Ice Cream Cake
Equipment
- 1 Serving Plate For assembling and serving the cake.
- 1 mixing bowl For mixing ingredients.
- 1 spatula For spreading ice cream and whipped topping.
- 1 Freezer To set the cake.
Ingredients
Ice Cream
- 2 quarts Ice Cream Choose your favorite flavors.
Graham Cracker Crust
- 1 cup Graham Cracker Crumbs For the crunchy crust.
Whipped Topping
- 1 container Whipped Topping For frosting the cake.
Toppings
- 1 bottle Chocolate Syrup For drizzling on top.
- 1 cup Fresh Fruit Seasonal fruits for decoration.
- 1 cup Sprinkles For a festive touch.
Instructions
Step 1: Gather Your Ingredients
- Collect your favorite ice cream flavors, cake layers, whipped cream, and sprinkles.
Step 2: Prepare the Cake Layers
- Bake your cake layers according to the recipe or use store-bought cakes for convenience.
Step 3: Let the Cake Cool
- Allow the cake layers to cool completely before assembling.
Step 4: Soften the Ice Cream
- Let the ice cream sit out for about 10 minutes to soften for easy spreading.
Step 5: Assemble the Cake
- Place one cake layer on a serving plate and spread a layer of ice cream on top.
Step 6: Add More Layers
- Repeat with additional cake and ice cream layers until you reach your desired height.
Step 7: Frost with Whipped Cream
- Cover the entire cake with whipped cream for a smooth finish.
Step 8: Decorate
- Add sprinkles, chocolate chips, or fruit on top for a fun touch.
Step 9: Freeze the Cake
- Place the cake in the freezer for at least 4 hours to set properly.
Step 10: Serve and Enjoy!
- Slice, serve, and watch everyone enjoy your delicious creation!
Notes
| Calories | Fat | Protein | Carbs |
|---|---|---|---|
| 250 | 10g | 3g | 35g |